Do you cringe at the sound when you record your guitar and playback the track? It’s common to encounter issues with recorded guitar quality, and the reasons can vary.
From tuning and intonation problems to old strings and improper setup, as well as poor playing or recording techniques, there can be many reasons behind the low sound quality when recording. Poor sound capture can result from inadequate recording or post-processing skills, even if your guitar is in perfect condition.
Incorrectly placed microphones, low-quality cables, recording devices, improper equipment use, or lack of understanding of capturing the essence of the guitar’s sound are usual suspects when it comes to bad-sounding guitar recordings.
Ensuring your instrument is in perfect condition, learning about recording and post-processing, and properly using good-quality recording gear will ensure high-quality sound recordings.
If you want to learn more about creating great-sounding guitar recordings, keep reading!
Fundamentals of Guitar Recording
Recording your guitar can sometimes produce less than great results if not done correctly. Issues such as a fuzzy sound, unwanted noise, or a lack of clarity can plague your recordings. However, with attention to the selection of proper equipment and the setup of your recording space, you can markedly improve the quality of your recordings.
Choosing the Right Equipment
To achieve a clean and clear sound from your recordings, choosing the right equipment is critical. Here’s a quick rundown of what you’ll need:
- Guitar: It should be well-maintained and properly tuned; a guitar with old strings or hardware issues can negatively impact your sound.
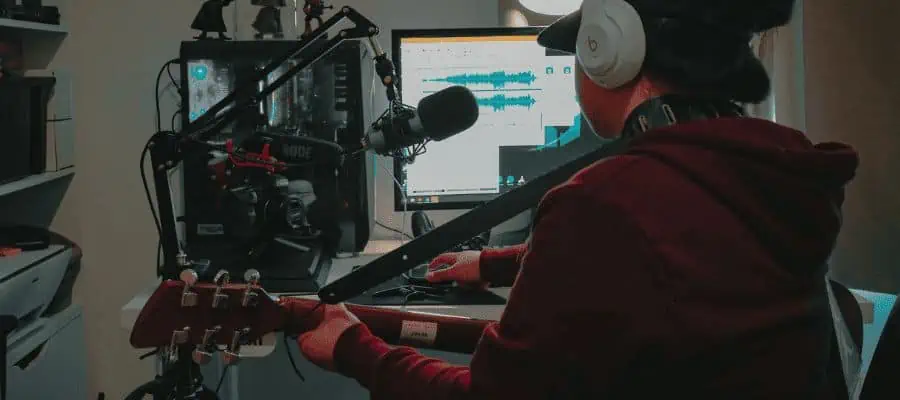
- Microphones: If recording acoustic, use a condenser mic for its sensitivity and range. For electric guitars, recording directly to the computer or using a dynamic mic like the Shure SM57 is a standard choice.
- Audio Interface: This device connects your microphone or guitar to your computer, converting the analog signal into digital. Ensure it has high-quality preamps and low latency.
- Cables: High-quality cables can reduce noise and interference.
Additionally, consider your digital audio workstation (DAW) and any necessary plugins to enhance your guitar’s sound during the post-processing stage.
Also, learning about using plug-ins, post-processing, and recording techniques can help you significantly on the way.
Setting Up Your Recording Space
The acoustics of your recording space play a significant role in the sound of your final recording if you use microphones. Implement these steps for a better recording environment:
- Use a room with minimal echo; carpets, curtains, and furniture can help absorb unwanted sound.
- Position your microphone carefully to avoid picking up ambient noise — aim it at the 12th fret for acoustic guitar.
- Keep electrical appliances away from your recording space to minimize interference.
Common Guitar Recording Problems

When you find your guitar recordings not meeting expectations, consider that some of the most common issues can profoundly impact the final sound quality. These problems are typically within your control and can be rectified with some attention to detail during the recording setup and process.
Poor String Quality
The strings of your guitar play a pivotal role in the quality of sound produced. Old or worn-out strings can result in a dull, lifeless sound lacking in both resonance and clarity. Ensure your strings are fresh and adequately stretched for a bright and vibrant tone.
Improper Mic Placement
The microphone captures the essence of your guitar’s sound, and its placement can significantly affect the recording. Placing the mic too close can lead to a boomy or overly bass-heavy sound, while too far can capture too much ambient noise. Experiment with the distance and angle to find the sweet spot that best represents your guitar’s natural sound.
Inadequate Sound Check
Before recording, performing a thorough sound check is crucial. It allows you to detect problems like background noise, too high or low levels, and unwanted distortion. Adjust your settings and the room as needed to ensure a clean, clear recording. Remember to listen carefully and make adjustments incrementally for the best results.
Enhancing Your Guitar Sound

When recording, achieving a great guitar sound is critical, but it can sometimes be complicated. To ensure your recordings shine, consider polishing your sound in post-processing, recording at the optimal levels, and using effects pedals to enhance rather than overwhelm your guitar’s natural tone.
Post-Processing Techniques
Post-processing can significantly improve the sound quality after you’ve captured your guitar’s performance.
- EQ (Equalization): Cut or boost frequencies to mold the tone to fit better in the mix. For instance, reducing low frequencies can minimize muddiness.
- Compression: Apply compression to even out the levels and add sustain to your playing.
- Effects: Use effects in moderation to create unique tones depending on the genre and desired sound. For example, reverb and-or delay can give space and depth to your guitar tones.
Optimizing Recording Levels
It’s crucial to record at levels that are neither too low nor too high.
- Gain Staging: Set your input levels so that the peak levels are around -6dB to leave enough headroom for mixing.
- No Clipping: Ensure the signal never clips (shows red on your meter), as digital clipping can cause harsh distortion.
Using Effects Pedals Wisely
Effects pedals can either detract from or enhance your recording.
- Signal Chain: Place your pedals in an order that makes sense for the sound you’re aiming for (e.g., tuner > wah > overdrive > delay > reverb).
- Tone Settings: Adjust the tone knobs on each pedal and remember that less is often more—subtle effects can be more effective.
By carefully controlling your post-processing, recording levels, and pedal usage, you can elevate the sound of your guitar recordings significantly.
Conclusion
Your guitar recordings can improve significantly with a few focused measures.
First, assess the quality of your equipment and settings. Ensure your guitar is well-tuned and your recording space is optimal for sound capture. Utilize proper mic placement and consider the acoustics of your environment.
Post-recording, invest time in mixing and editing to polish the sound. Recall heavy gauge strings may enrich tone while adjusting EQ can counter tinny sounds. By implementing these practical steps, your future guitar recordings will bear more clarity, depth, and overall quality. Keep learning, experimenting, and fine-tuning your skills.
If you found this article useful, you may want to save this pin below to your Guitar board.

Recent Posts
When learning new songs have you noticed that some of the chord sequences sound really good? But when you tried to come up with your own chord sequence, or as we call it chord progression, you found...
Some guitarists insist on buying an expensive amplifier with their electric guitar. They assume that this is a must for every type of guitarist out there. However, in some situations, this isn’t...