
Changing guitar strings is an often overlooked but necessary procedure that you should do every few weeks. One of the most common questions about stringing the guitar is the order in which you thread the strings; does it matter, or should you simply choose the strings at random?
The order in which you restring your guitar does not matter at all as long as you don’t wind them right away. You can change them one by one or take all strings off, clean the neck, and put in the new strings. You can start with the 1st or the 6th string as your guitar couldn’t care less. However, if it is your first time changing strings, I recommend you start with the 6th string (low E) as it is the easiest one to change.
If you want to know more, stick around! I will explain the key factors of changing strings and debunking the myths about the relevance of restringing order. Additionally, I will show you the steps you need to take to string your guitar properly.
Why The Restringing Order Doesn’t Matter

If you’re changing your guitar strings for the first time, you may wonder if there is a specific order you should follow when changing the strings. The answer is no; your guitar does not care about the order you restring it.
Different specialists and musicians will have different answers to this question because every instrument is unique and has specific requirements. Most experts argue that the order does not matter, but there are some exceptional guitars that a specific order might make the process easier and safer for your instrument.
There are also some people arguing that you should follow a specific order. The main argument is that the specific order helps maintain the right amount of tension on the neck. If you were to choose the strings to change randomly, you could cause the neck to warp because of the uneven tension.
In this argument, instead of removing all the strings and freeing the neck, you remove the low E string and put in the new one to maintain the tension on the neck. Then you go for the A string, then to D, and so on.
Most experts argue that this tension change is irrelevant and that removing all the strings is fine. Your guitar does not care about the order, meaning you can choose any order you like, as long as you don’t wind them to pitch. Once you replace every string, you can start winding them properly one by one, maintaining a similar tension throughout the process.
In any case, if you’re stringing your guitar for the first time and are still figuring everything out, it is better to start with the 6th string (low E) as it is the easiest one to change. The high E string is thin, slippery, and harder to manage.
How Should You Change the Strings?
Another important question that most beginners ask is how to change the strings. Should you remove them all simultaneously and then replace them, or change each string at a time? There are several different opinions on this question as well.
Once again, both options are valid; some experts argue that the one-by-one approach is better for maintaining the tension. However, most experts and guitarists argue the force is so small and the time is so short it is almost impossible to damage the neck this way.
You can choose whatever method you like, but if you decide to remove all the strings, you can also clean and polish the interior parts and the fretboard, as they are easier to reach without strings. This is crucial for your guitar’s maintenance.
Another important aspect is the tuning process. While there are different approaches for restringing, most guitarists agree that the tuning should start from the low E, aka the 6th strings, followed up by A, D, G, B, and E. After, that goes for a second round as each string’s tuning process significantly or slightly affect the other strings. The effect degree will vary according to the bridge type.
In What Order Should You String Your Guitar?
If you choose to follow an order when stringing your guitar, you should start with the thickest string, the sixth, or the low E string. Typically, the thickest string is actually the one that is under the most tension, but at the same time, it is easier to remove because it is more practical to handle.
The thinnest string should be the last one because it’s more difficult to remove, considering how delicate and slippery it is. Moreover, this particular order helps relieve the tension in the neck gradually. So, here’s the correct order that you should follow to change the guitar strings:
- Low E string
- A string
- D string
- G string
- B string
- High E string
However, certain instruments may require a different order if their design requires it. If you’re unsure, check the manufacturer’s manual to see if it mentions any particular order; if it doesn’t, go with the safe option.
As mentioned before, according to most experts, this order does not affect the guitar in any way. But if you don’t want to take risks, you can go with this order. Just be sure to remove all the strings once in a while to clean and polish the fretboard and the interior parts.
Is The Restringing Process Different For Different Bridge Types?

Different bridge types react differently to the tension change during the restringing process. This is not an issue on acoustic guitars and electric guitars with fixed bridges, but it matters for electric guitars with floating bridges.
With Floyd Rose and tremolo bridges, when you remove all the strings, the bridge bends all the way backward. It can even fall off the anchors, giving you a bit of a challenge. The springs may go out of their holes as well. If that happens, you should remove the back lid and install them in the same positions again. This is not harmful to your guitar at all, but it just prolongs the process.
So, if you want the restringing to be shorter, you can go with the one-by-one approach here, starting with removing the low E string and putting in the new one before moving on to the A string. This way, you can maintain the tension to prevent any issue that may elongate the process.
Another option is to put something soft, like a piece of cloth, under the bridge before you start removing all the strings. The way you do it is by putting the tremolo arm into the bridge and pressing it down towards the guitar, after the back of the bridge has risen, put a cloth that is folded several times under it and bring the bridge slowly back to its straight position. After that, you should be able to remove all the strings.
How To Restring Your Guitar

Now that your main questions have been answered, it’s time to learn the specific steps you need to take to string your guitar. Again, I should emphasize that different musicians and experts may have various steps and tricks, but the general order of actions remains more or less the same.
Here are the steps you should follow in order to string your guitar properly:
- Prepare your tools. You should have the new set of strings ready, as well as a string winder and a set of pliers or wire cutters. Keep a guitar tuner to make sure you string the guitar properly.
- Prepare your bridge. If you have a Floyd Rose or a tremolo bridge, put a folded cloth under it.
- Loosen the strings. This crucial step ensures the string won’t snap and hurt you once you cut it loose. You can use your hands or a string winder to unravel the string slowly until it is completely loose.
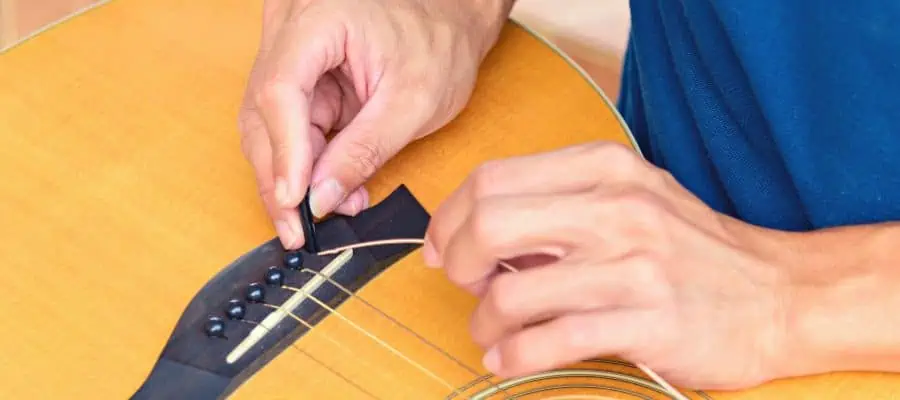
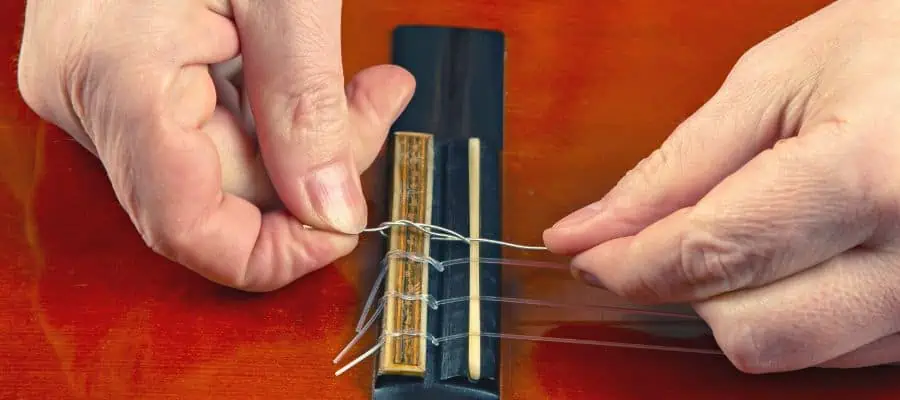
- Take the strings off. Cut the string using pliers or wire cutters, then remove it from the guitar. If you’re stringing an acoustic guitar, remove the bridge pins to remove the strings.
- Clean and polish the fretboard. You can use lemon oil or any special product to clean and polish the fretboard and the frets.
- Put the new strings on the guitar. As mentioned above, start with the low E string, which should be identifiable by its gauge. Carefully thread the string through the tuning peg.
- Tune the strings. Using your guitar tuner, tune each string to the desired pitch. Once again, you can start with the low E string and continue according to the order.
- Cut the excess string length and test the strings. Ensure the guitar is properly tuned, everything sounds smooth, and there is no buzzing effect.
- Remove the cloth. Remove the cloth under the bridge if you put in step 2.
Conclusion
Stringing your guitar can seem quite challenging, especially if you’re attempting it for the first time, but it can be relatively simple once you know what to do. Typically, you can change the strings however you like. You have the one-by-one approach following a certain order to maintain the string tension and avoid neck wrap. Also, you can remove all the strings, clean the fretboard and frets, and put in the new strings.
I prefer the second option as it allows me to take care of my fretboard, frets, and the parts under the guitar’s body that I can’t reach when there are strings.
If you want to use the one-by-one approach, start with the low E string and continue with the A, D, G, and B strings. The last string in the order should be the high E string. Loosen all the strings before changing them so there’s no tension once you cut them.
If you found this article useful, you may want to save this pin below to your Guitar board.

Recent Posts
When learning new songs have you noticed that some of the chord sequences sound really good? But when you tried to come up with your own chord sequence, or as we call it chord progression, you found...
Some guitarists insist on buying an expensive amplifier with their electric guitar. They assume that this is a must for every type of guitarist out there. However, in some situations, this isn’t...